Adding pictures to answer options
Put a picture on any answer option in a quiz or poll, such as a diagram, a symbol or a piece of equipment, for students to choose between.
Updated 1 November 2026
Some choices are easier to show than to describe. Add a picture to an answer option and students choose between the pictures, with or without words beside them.
When to use it: Identifying a diagram, a graph, a hazard symbol, a shape, a map or a piece of lab equipment. Or a poll where students pick the image that best matches how they feel.
Where you can use it. On the answer options of Quiz and Poll questions, on every plan. True/false questions and rating scales keep their own options, so they can’t have pictures. To add a picture to the question itself instead, see adding descriptions and images to questions.
Add a picture to an option
- Open the question (or add a new Quiz or Poll question) and write it as usual.
- In the option’s row, select the picture button beside the option text. Hover over it and it says Add image. You can also paste a picture into the option, or drop one onto it.
- Choose your picture. It appears in the option, showing Adding image… while it uploads.
- If you like, choose Add description under the picture and say what it shows in the Describe this image box (up to 250 characters).
- Do the same for the other options, mark the correct one on a quiz, and choose Save question.
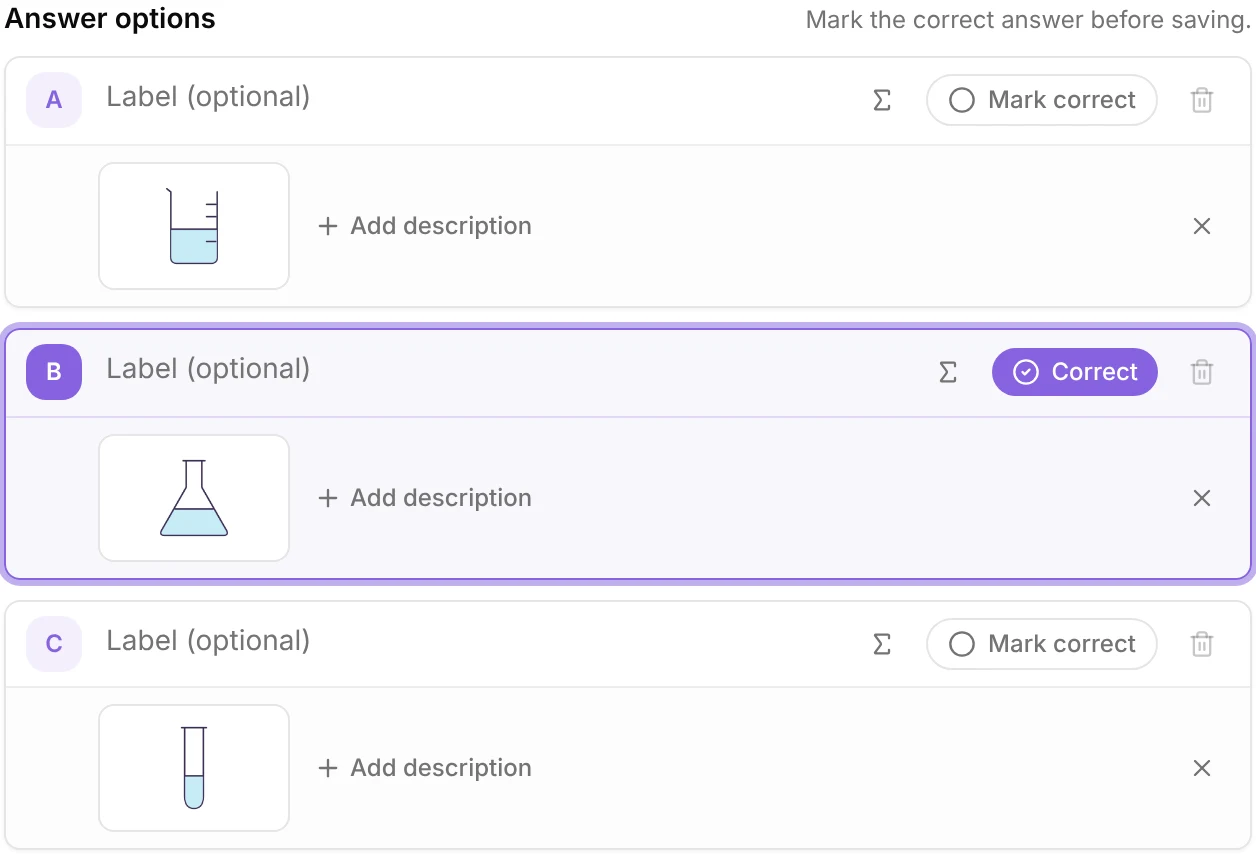
- One picture per option. To swap it, remove it with the cross beside it and add another.
- Words are optional. Once an option has a picture, its text box says Label (optional). An option can be a picture on its own, shown with its letter.
- PNG, JPEG, WebP or HEIC (iPhone photos), up to 20 MB each.
- Saving waits until every picture has finished uploading.
On a phone, each option’s buttons (maths, picture, Mark correct and delete) sit on their own line under the option.
Describe each picture
The description is what a screen reader reads out in place of the picture, so write what students need to tell the options apart: “Beaker” or “Conical flask” rather than “a picture”. Nurture AI reads the descriptions too, but never the pictures themselves.
What students see
Each picture sits inside its option. Tapping the picture or the words chooses that option, as usual. The enlarge button in the corner of a picture opens it full size without choosing it, so students can look closely first.
Your results show each picture beside its option: in the answer bars, the insights and on the presenter view.
Good to know
- Duplicating a session or saving it to the Library keeps the pictures.
- Printed answer cards stay as letters only, so the pictures show on your presenter screen but not on the cards.
- Switching a question to Open answer removes its options, pictures included.
Related articles
Still stuck?
We're happy to help you directly. Get in touch with the Nurture team.